DELLのデュアルブート、Windows 10のサポートが終わるのでi3 Window Managerデビューしたら幸福度が上がったこと
今日は2026年04月04日です。個人の翻訳事務所 ヒノトリホンヤクの本店がある東京都日野市の天気は小雨というか曇り。
個人の翻訳事務所 ヒノトリホンヤク の代表、今年も先々月に確定申告を終わらせました。 生存しています。 笑
マンガ「スラムダンク」風に言うならば
今回のストーリーに関連するポスト……。はこちら。(2024年9月の投稿です)
Ubuntu 24.04 LTSでデュアルブートのGRUB消失
これが問題のDELL Latitude 3340の外観です。 まあ、フタ昔前の「ノートパソコン」ですね。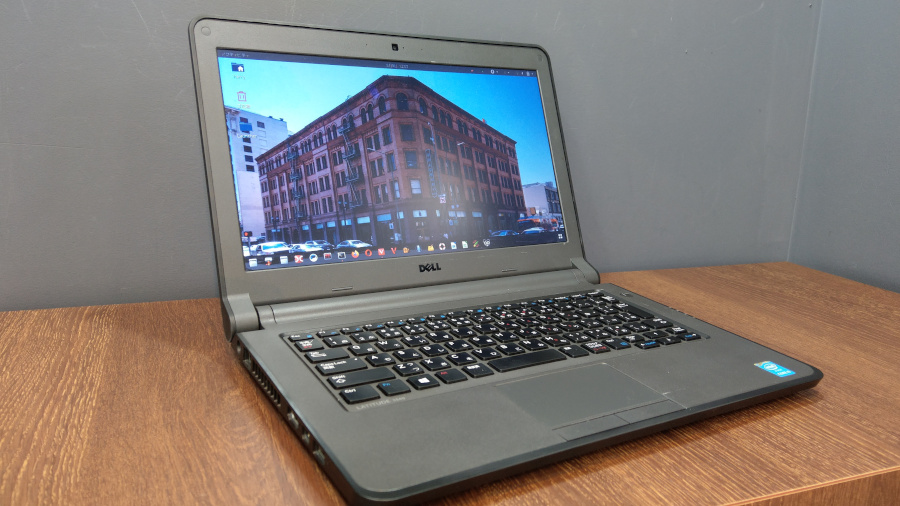
今回は、DELL Latitude 3340をついにFreeBSD化しました。
(今まではUbuntu 24.04LTSとWindows10)
必死でWindowsとUbuntuのデュアルブート(古ッ……笑)を守ってきたのですが、もうWindows 10がサポート終了です。 GNOMEベースの素(ス)のUbuntuにも、飽きてきました。
CPU: Core i5 4210U
LCD: 1366 x 768 pxls
Video: Intel HD 4400 Haswell-ULT Integrated Graphics Controller
RAM: 16GB
Storage: Lexar 256GB SSD
今回のFreeBSDインストールについて:
(1) ZFSを使用
さいきんは、もはやZFSを希望。
怖れることはない。
hp X360 11-ab000 というギリギリであんまりなラップトップでも、ZFSでなんとか動いています。 (FreeBSD 13.1-RELEASE, CPU: Celeron N3060, RAM: 4GB, SSD: 128GB)メモリはたったの4GBです。
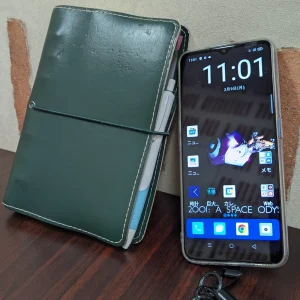
こんなスペックでも、映画2001年宇宙の旅の本編をフツーに再生できています。HDです。しかもタッチスクリーンです。
(2) 自力でOSインストールする。
NomadBSDやGhostBSDではなく、久しぶりに素のFreeBSD。
FreeBSD 15.0-RELEASE-p4 amd64
(3) 念願のタイル型ウィンドウマネージャーデビュー。
(なにか新しいことをやらないとね。たまには。)
いよいよ、i3 Window Managerに挑戦します。 i3 Window Managerについては下記を参照。
i3 window manager screencast v4.1 (YouTube)
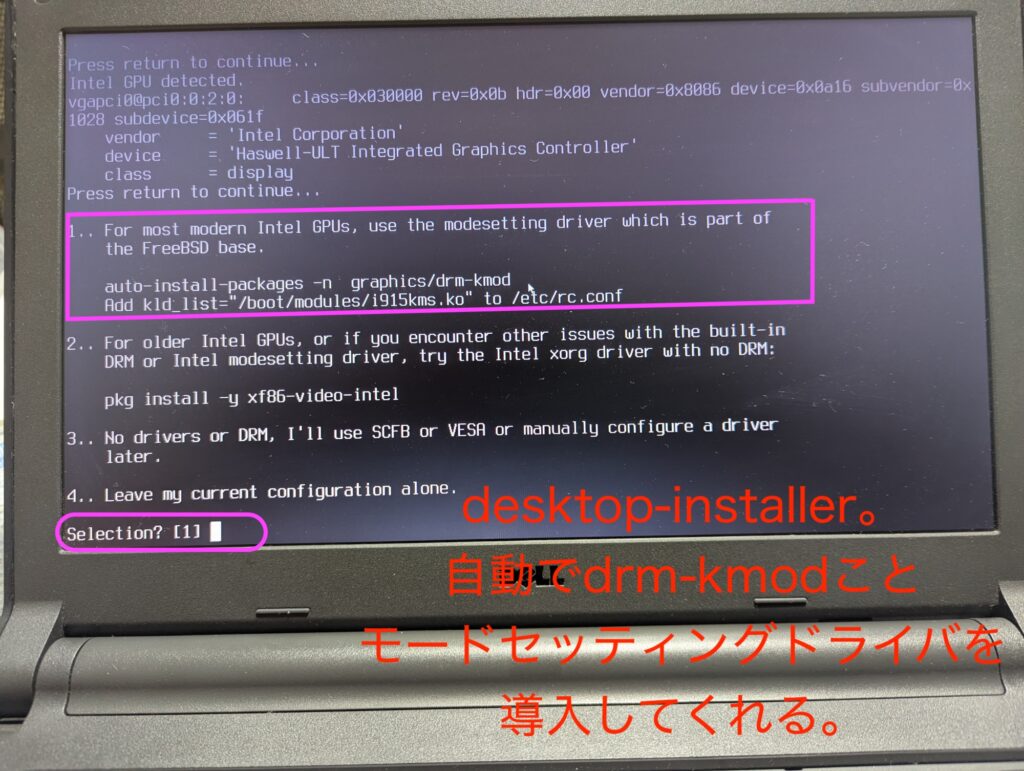
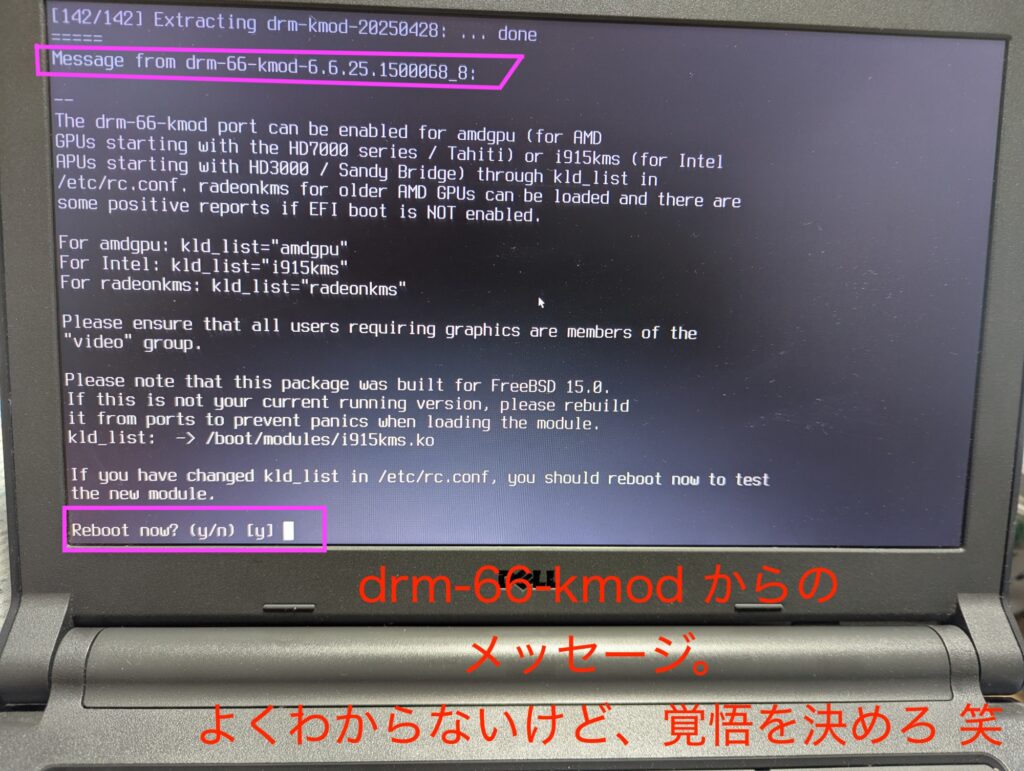
(4) 最近できてきたFreeBSDのdesktop-installerを使用します。
これは(FreeBSDの、というのはpkgやportsでオフィシャルに供給されているという意味) スクリプトらしいけど、
pkg install desktop-installer
で導入できるので、割と手軽ですよ。
ビデオカードの設定と、サウンドカードのドライバの導入と、複数のデスクトップ環境、Window Managerをラクにインストールできます。
i3の場合は、desktop-installerの環境選択の画面の「カスタム」で
x11/i3
を入力すればいいです。
(5) その他の覚書(順番はめちゃくちゃ)
desktop-installerを走らせる前に、
vim、sudo、doas をインストールしておきます。
desktop-installerスクリプトを走らせたら、以下のアプリケーションなどをpkgでインストールしましょう。
rofi, dmenu, polybar, fusefs関連, dsbmc, dsbmd, dsbmc-cli, terminator, sakura, geany, firefox-esr, pcmanfm, thunar, sayonara, cmus, musikcube, vlc, smplayer, mpv, picom, fcitx5, anthy, grsync, dsbmixer, clipit, mc (midnight commander), htop, gotop, bpytop, bsdinfo, neofetch, midori, fish, viewnior, xarchiver, libva-drivers, libva-utils, networkmgr, feh, fastfetch
注:事前リサーチの結果、アプリケーションランチャーにはrofiを使うつもりでしたし、そうしました。(rofiは、Crunchbangplusplusで経験済み)それでも、dmenuはインストールしておいた方がいいです。あとで困ります。
そのほかは、気に入ったターミナルエミュレータ、テキストエディタ(私の場合はgeany)、ファイルマネージャー(私の場合はpcmanfmとthunar)、networkmgr(ネットワークマネージャーapplet)、気に入ったIMEとかな漢字変換エンジン(今回は諸般の事情でfcitx5とanthy)、アーカイバー(今回はxarchiver)、feh(イメージビューアー、デスクトップバックグラウンドのこともあるので、悪いことは言わない、インストールしておきましょう)、オーディオプレイヤー(私の場合はcmusとmusikcubeとsayonara)、ビデオプレイヤー(vlcとsmplayer)、サウンドミキサーアプレット(私の場合はdsbmixer)、Webブラウザ(firefox-esr一択だが、バックアップにmidori)
さらにそのほかのgrsyncとかdsbmd、dsbmcなどは、必須ではありません。不便でもドコンジョウでなんとかなります。
polybarは、i3 Window Managerで便利なシステムトレイ付きのタスクバーです。 i3 Window Managerの標準のbarは最低限度のものしかない上に夢がないので、polybarがおすすめです。
(6) デスクトップスクリーンショット(ドヤリング)
インストールと設定が終わったあとのi3 Window Manager on FreeBSD 15.0-RELEASE on DELL Latitude 3340。

⬆️ Window ManagerなのにWindowを開いていない状態。
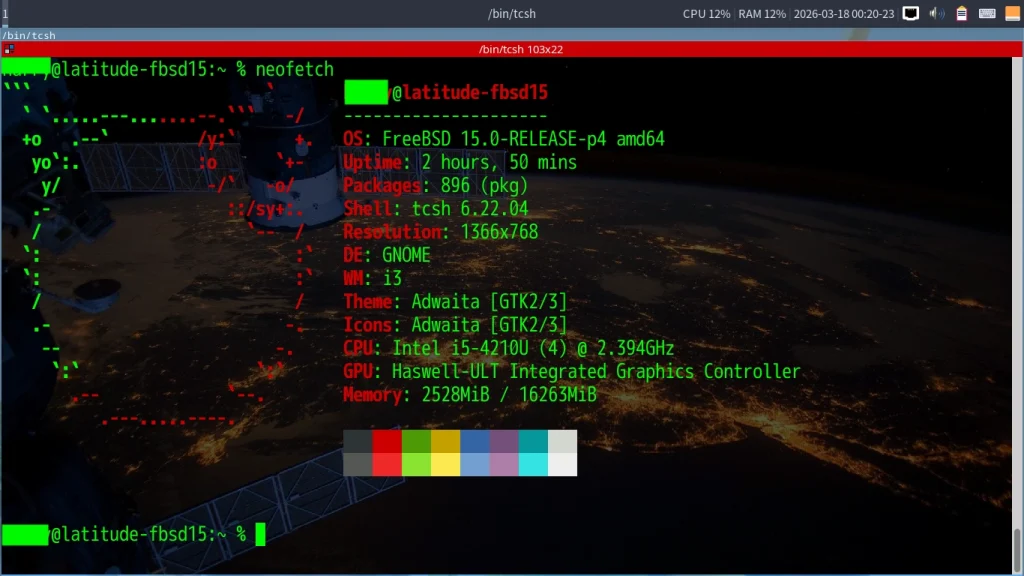
⬆️ neofetch 実行時。
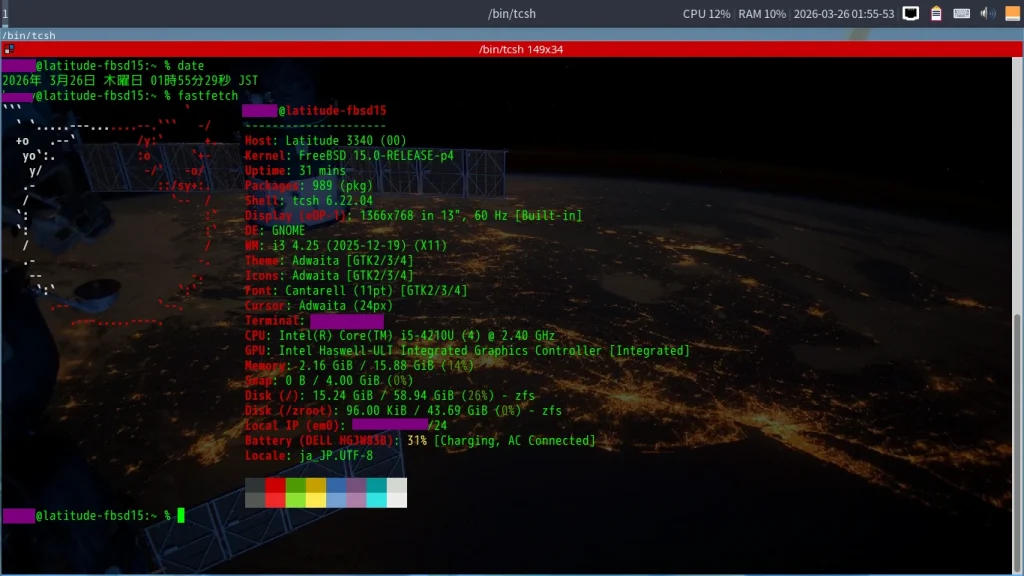
⬆️ fastfetch 始めました。 DEがGNOMEとか言ってますが、間違ってます。GNOME入れてません。ターミナルエミュレータの情報もおかしいです。Terminator使ってます。Diskの使用状況もなんかヘンです。 ZFSなので私もよくわかってないですが。
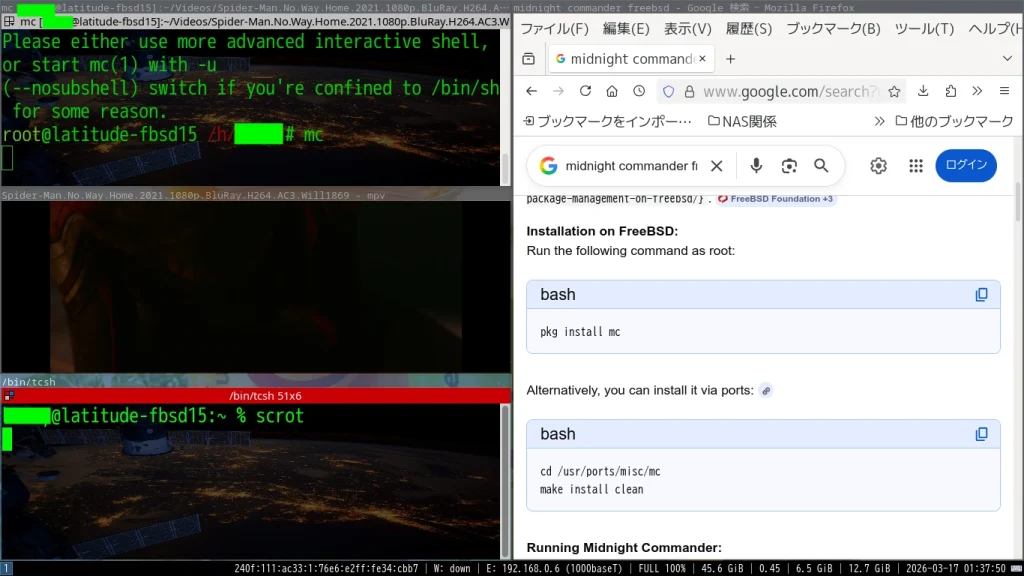
⬆️ タイル型Window Managerはこうだぜ、というスクリーンショット。
厨二病ですね。
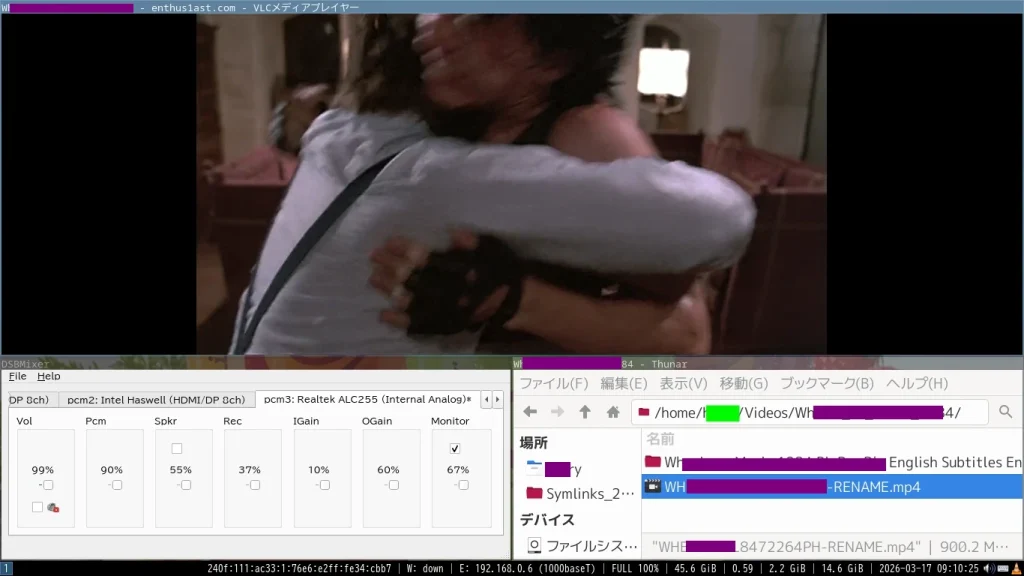 ⬆️ もっと実用的なスクリーンショット。Wheels on Mealsを視聴してるように見えますが、気のせいです。男がふたり、再会をよろこんでハグしているだけです。
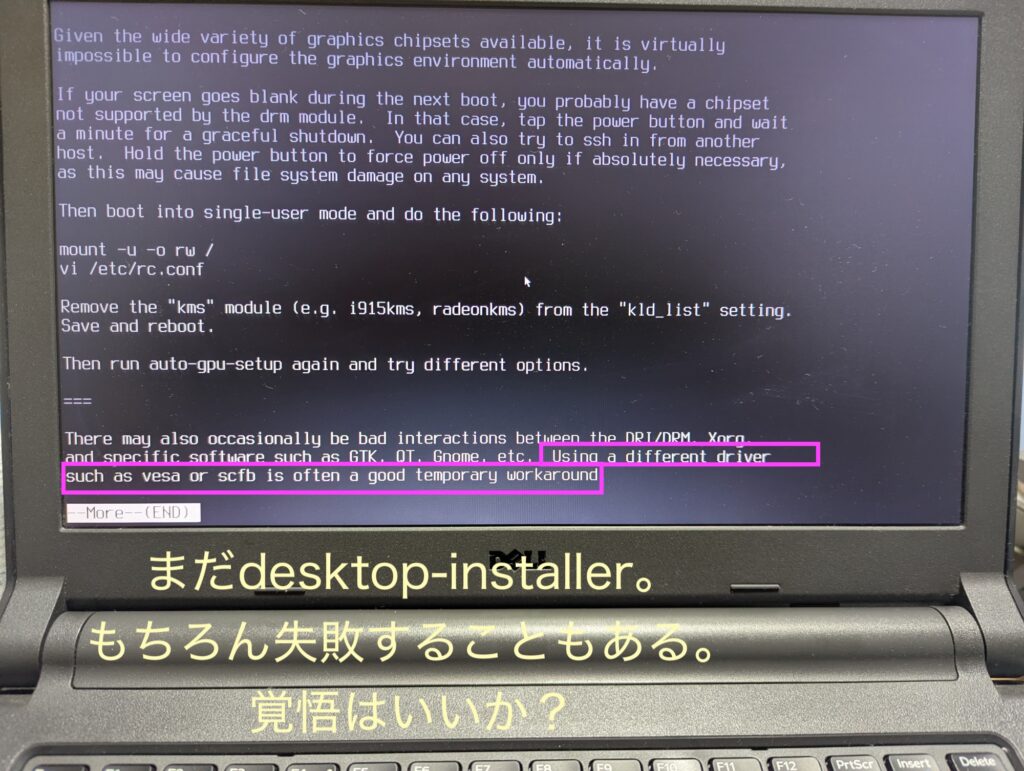
手動でのFreeBSD 15.0-RELEASEインストール中と、the desktop-installerを実行中のイメージギャラリーです。⬇️
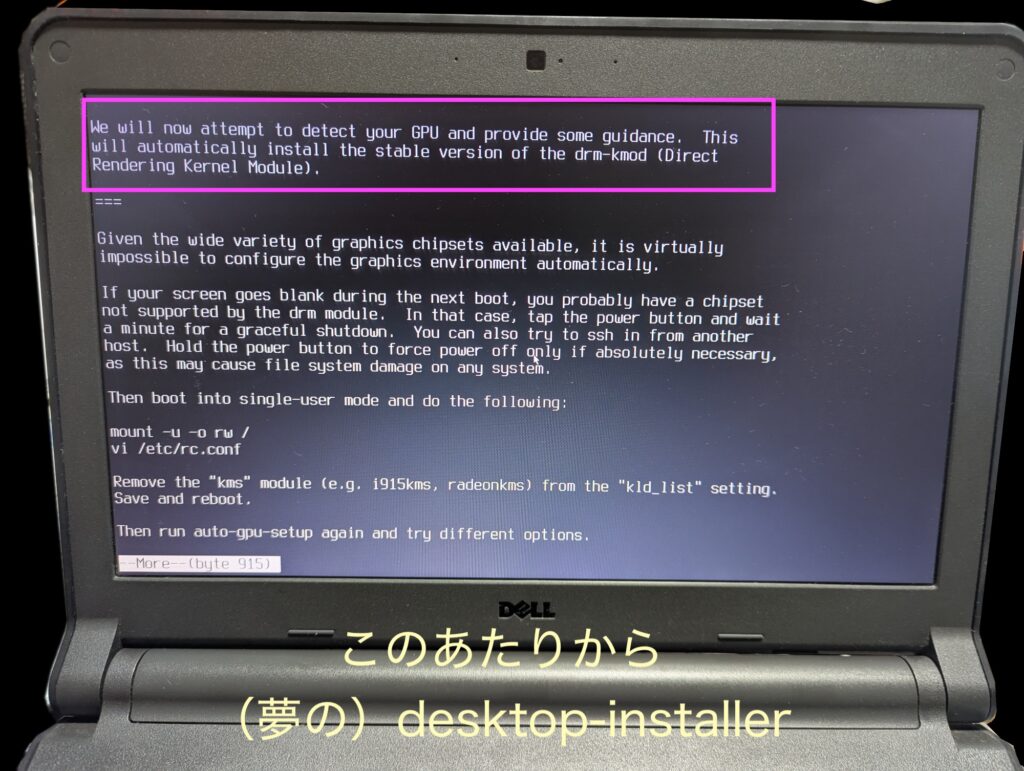
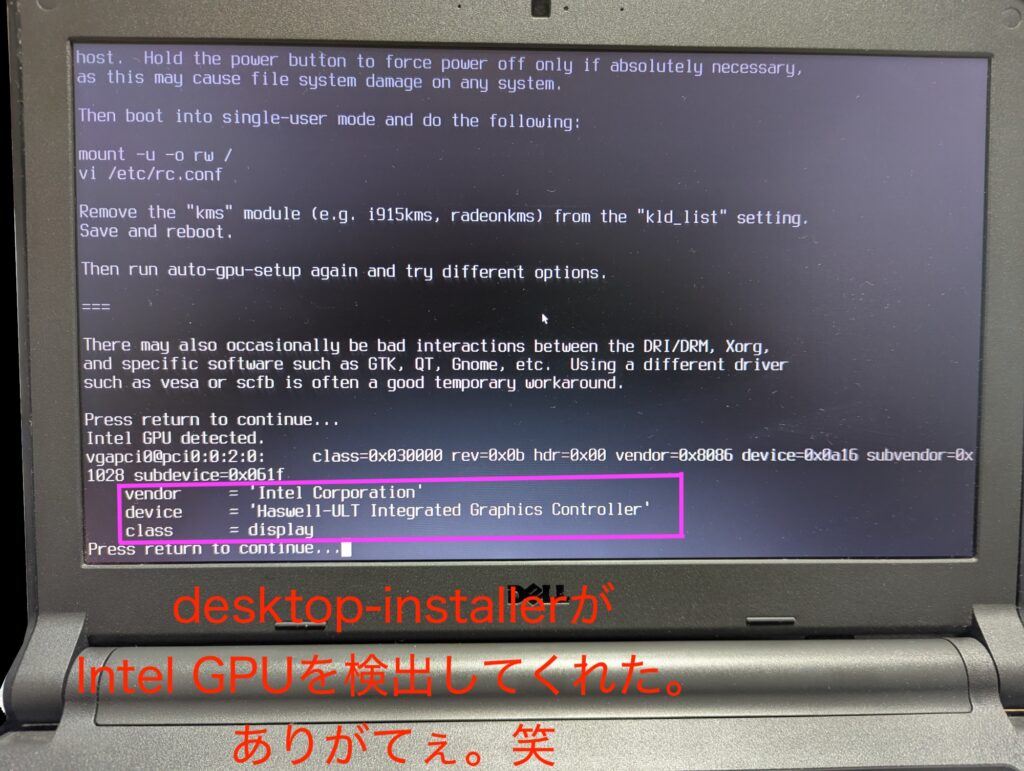
やはり、NomadBSDやGhostBSDなしで素手でFreeBSDをインストールするときは、ドキドキします。
それから、i3 Window Managerについては、私も来週から下のビデオを観て勉強しようと思います。
今日現在では、rofiアプリケーションランチャーを使ってアプリケーションを起動し、使いたいウィンドウにフォーカスを移してから最大化、音楽を聴くときはターミナルエミュレータを起動してcmusかmusikcubeです。アプリケーションを終わらせるときは、フォーカスをそのウィンドウに移して、いきなり終了(Mod + Shift +Q)という感じです。たぶん、まだ色々と見落としているテクニックがあると思います。
忘れる前に。(自信がありますが、2か月後には全部忘れます)
一般的なi3 Window Managerの設定から変えた(ちょっとだけカスタマイズした)のは下記の点です。
(1) アプリケーションランチャーは、dmenuがあまり好みでなかったので(テキストが小さい。スクリーン上部にランチャーが出るので視線移動が大きくウンザリ)、rofiを選択。 使わないからという理由でdmenuのインストールをスキップすると、Mod + dでランチャーを召喚するという動作までできなくなる。まずはdmenuもインストールして生き残れ。カスタマイズはその後。 それでもまだ、rofiをデフォルトの環境設定で召喚すると、アプリケーションの名前のテキストが正しく表示されない。rofiの設定ファイルをテキストエディタで編集してpadding(余白というか行間というか)を調整する必要があった。この作業では、チャット型のAIのお世話になった。時代も変わるものだ。
(2) システムトレイ付きタスクバーはpolybarをインストールした。デフォルトのbarはi3barとかi3statusとか複雑だったが、起動させない。 polybarの環境設定は、複雑で難解なのでこれもAIのお世話になった。 polybarは色々と厨二病っぽくカスタマイズできるようだが、必要最小限のイジリにしておいた。
あまり手を加えすぎると鰻屋の秘伝のタレになってしまい、鰻屋のオヤジでさえも再現できなくなる。こういうのはストレスのもと。
最後に、i3の全体の環境設定の結果を置いておく。 あまりいじったつもりはないのだが、すでに少々「秘伝のタレ」化している。
ファイルとしては、 ~/.config/i3/config
#########
########
######## the copy of /home/MYNAME/.config/i3/config
######## on 2026-03-25
######## by hinotori-honyaku
########
# This file has been auto-generated by i3-config-wizard(1).
# It will not be overwritten, so edit it as you like.
#
# Should you change your keyboard layout some time, delete
# this file and re-run i3-config-wizard(1).
#

# i3 config file (v4)
#
# Please see https://i3wm.org/docs/userguide.html for a complete reference!

set $mod Mod4

# Font for window titles. Will also be used by the bar unless a different font
# is used in the bar {} block below.
font pango:monospace 10

# This font is widely installed, provides lots of unicode glyphs, right-to-left
# text rendering and scalability on retina/hidpi displays (thanks to pango).
#font pango:DejaVu Sans Mono 8


###### set wallpaper on Mar. 15, 2026 by hinotori-honyaku manually
#
exec --no-startup-id ~/.fehbg
#
#
#
# Start XDG autostart .desktop files using dex. See also
# https://wiki.archlinux.org/index.php/XDG_Autostart
exec --no-startup-id dex --autostart --environment i3

# The combination of xss-lock, nm-applet and pactl is a popular choice, so
# they are included here as an example. Modify as you see fit.

# xss-lock grabs a logind suspend inhibit lock and will use i3lock to lock the
# screen before suspend. Use loginctl lock-session to lock your screen.
exec --no-startup-id xss-lock --transfer-sleep-lock -- i3lock --nofork

# NetworkManager is the most popular way to manage wireless networks on Linux,
# and nm-applet is a desktop environment-independent system tray GUI for it.
exec --no-startup-id nm-applet

# Use pactl to adjust volume in PulseAudio.
set $refresh_i3status killall -SIGUSR1 i3status
bindsym XF86AudioRaiseVolume exec --no-startup-id pactl set-sink-volume @DEFAULT_SINK@ +10% && $refresh_i3status
bindsym XF86AudioLowerVolume exec --no-startup-id pactl set-sink-volume @DEFAULT_SINK@ -10% && $refresh_i3status
bindsym XF86AudioMute exec --no-startup-id pactl set-sink-mute @DEFAULT_SINK@ toggle && $refresh_i3status
bindsym XF86AudioMicMute exec --no-startup-id pactl set-source-mute @DEFAULT_SOURCE@ toggle && $refresh_i3status

# Use Mouse+$mod to drag floating windows to their wanted position
floating_modifier $mod

# move tiling windows via drag & drop by left-clicking into the title bar,
# or left-clicking anywhere into the window while holding the floating modifier.
tiling_drag modifier titlebar

# start a terminal
bindsym $mod+Return exec i3-sensible-terminal

# kill focused window
bindsym $mod+Shift+q kill

# start dmenu (a program launcher)
# bindsym $mod+d exec --no-startup-id dmenu_run
# A more modern dmenu replacement is rofi:
# bindcode $mod+40 exec "rofi -modi drun,run -show drun"
bindsym $mod+d exec "rofi -modi drun,run -show drun"
# There also is i3-dmenu-desktop which only displays applications shipping a
# .desktop file. It is a wrapper around dmenu, so you need that installed.
# bindcode $mod+40 exec --no-startup-id i3-dmenu-desktop

# change focus
bindsym $mod+j focus left
bindsym $mod+k focus down
bindsym $mod+l focus up
bindsym $mod+semicolon focus right

# alternatively, you can use the cursor keys:
bindsym $mod+Left focus left
bindsym $mod+Down focus down
bindsym $mod+Up focus up
bindsym $mod+Right focus right

# move focused window
bindsym $mod+Shift+j move left
bindsym $mod+Shift+k move down
bindsym $mod+Shift+l move up
bindsym $mod+Shift+semicolon move right

# alternatively, you can use the cursor keys:
bindsym $mod+Shift+Left move left
bindsym $mod+Shift+Down move down
bindsym $mod+Shift+Up move up
bindsym $mod+Shift+Right move right

# split in horizontal orientation
bindsym $mod+h split h

# split in vertical orientation
bindsym $mod+v split v

# enter fullscreen mode for the focused container
bindsym $mod+f fullscreen toggle

# change container layout (stacked, tabbed, toggle split)
bindsym $mod+s layout stacking
bindsym $mod+w layout tabbed
bindsym $mod+e layout toggle split

# toggle tiling / floating
bindsym $mod+Shift+space floating toggle

# change focus between tiling / floating windows
bindsym $mod+space focus mode_toggle

# focus the parent container
bindsym $mod+a focus parent

# focus the child container
#bindsym $mod+d focus child

# Define names for default workspaces for which we configure key bindings later on.
# We use variables to avoid repeating the names in multiple places.
set $ws1 "1"
set $ws2 "2"
set $ws3 "3"
set $ws4 "4"
set $ws5 "5"
set $ws6 "6"
set $ws7 "7"
set $ws8 "8"
set $ws9 "9"
set $ws10 "10"

# switch to workspace
bindsym $mod+1 workspace number $ws1
bindsym $mod+2 workspace number $ws2
bindsym $mod+3 workspace number $ws3
bindsym $mod+4 workspace number $ws4
bindsym $mod+5 workspace number $ws5
bindsym $mod+6 workspace number $ws6
bindsym $mod+7 workspace number $ws7
bindsym $mod+8 workspace number $ws8
bindsym $mod+9 workspace number $ws9
bindsym $mod+0 workspace number $ws10

# move focused container to workspace
bindsym $mod+Shift+1 move container to workspace number $ws1
bindsym $mod+Shift+2 move container to workspace number $ws2
bindsym $mod+Shift+3 move container to workspace number $ws3
bindsym $mod+Shift+4 move container to workspace number $ws4
bindsym $mod+Shift+5 move container to workspace number $ws5
bindsym $mod+Shift+6 move container to workspace number $ws6
bindsym $mod+Shift+7 move container to workspace number $ws7
bindsym $mod+Shift+8 move container to workspace number $ws8
bindsym $mod+Shift+9 move container to workspace number $ws9
bindsym $mod+Shift+0 move container to workspace number $ws10

# reload the configuration file
bindsym $mod+Shift+c reload
# restart i3 inplace (preserves your layout/session, can be used to upgrade i3)
bindsym $mod+Shift+r restart
# exit i3 (logs you out of your X session)
bindsym $mod+Shift+e exec "i3-nagbar -t warning -m 'You pressed the exit shortcut. Do you really want to exit i3? This will end your X session.' -B 'Yes, exit i3' 'i3-msg exit'"

# resize window (you can also use the mouse for that)
mode "resize" {
        # These bindings trigger as soon as you enter the resize mode

        # Pressing left will shrink the window’s width.
        # Pressing right will grow the window’s width.
        # Pressing up will shrink the window’s height.
        # Pressing down will grow the window’s height.
        bindsym j resize shrink width 10 px or 10 ppt
        bindsym k resize grow height 10 px or 10 ppt
        bindsym l resize shrink height 10 px or 10 ppt
        bindsym semicolon resize grow width 10 px or 10 ppt

        # same bindings, but for the arrow keys
        bindsym Left resize shrink width 10 px or 10 ppt
        bindsym Down resize grow height 10 px or 10 ppt
        bindsym Up resize shrink height 10 px or 10 ppt
        bindsym Right resize grow width 10 px or 10 ppt

        # back to normal: Enter or Escape or $mod+r
        bindsym Return mode "default"
        bindsym Escape mode "default"
        bindsym $mod+r mode "default"
}

bindsym $mod+r mode "resize"

# Start i3bar to display a workspace bar (plus the system information i3status
# finds out, if available)
#####
## i3bar is disabled by hinotori-honyaku manually. On Mar. 17, 2026 #
##
##
# bar {
#        status_command i3status
# }
#
#
exec_always --no-startup-id clipit
exec_always --no-startup-id dsbmixer -i
exec_always --no-startup-id dsbmc -i

## polybar is launched instead of the i3bar. written ##
## by hinotori-honyaku on Mar. 17, 2026 ##
exec_always --no-startup-id ~/.config/polybar/launch.sh

##### some apps should be launched floated. #####
##### added by hinotori-honyaku on Mar. 25, 2026 #####
#####
#####
for_window [class="Pcmanfm"] floating enable, resize set 1024 700
for_window [class="Thunar"] floating enable, resize set 1024 700
for_window [class="com.sayonara-player.Sayonara"] floating enable, resize set 904 500
for_window [class="Deadbeef"] floating enable, resize set 400 300
for_window [class="Geany"] floating enable, resize set 1024 500
for_window [class="vlc"] floating enable, resize set 824 400
for_window [class="smplayer"] floating enable, resize set 424 390